- Tel:+86 10-57536875 ext.801 Copyright DeMer-River 京ICP备案14015669号
-
Your present position: Home >> Products >> NDT&NDE Instrument >> Ultrasonic Flaw Detector
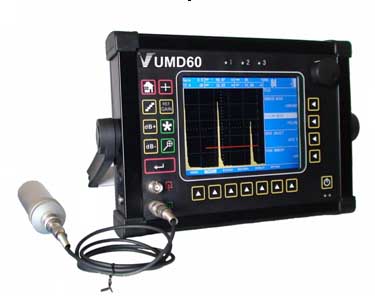
UMD60
Portable Ultrasonic Flaw Detector
Analog performances, digital advantages
The UMD60 combines the digital powerfuladvantages with the analog high performances. The high resolution (640 x 480pixels) color LCD display, 100 Hz update rate, and single shot measurementtechnique produce a fast, smooth response for immersion and critical weldtesting. The quality, durability, dependability and ease of use still remainsin this instrument. From rugged field inspections to high resolution thinmeasurements, long acoustically clean materials, and immersion systems work,the UMD60 extends the range of applications that a portable instrument canperform.
SquareWave Pulser selectableand tunable for optimum probe matching to satisfy a wide range oftough-to-penetrate applications.
Now, either spike or square wave pulser is user selectable from the front panel.
• Spike pulsers are still preferred for everyday use.
• For low frequencies, square wave pulsers allow optimum probe matching byadjusting pulse width and voltage.
• Difficult to penetrate metallic applications and especially non- metalsinspection like composite materials are optimized.
• Pulse width is tunable up to 1000 ns in 10 ns steps for optimum probematching and versatility in meeting a wide range of applications.
• Pulse voltage is adjustable from 20 to 500 V in 10 V steps.
Ruggeddurability, great than 8 hours of battery use, fast rotary knob operation,outstanding ultrasonic performance, and now square wave pulser and color legcombine to form a powerful portable ultrasonic inspection tool with new LithiumIon battery.
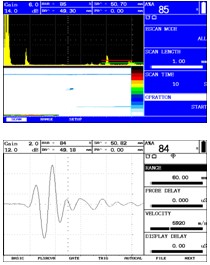
Corrosion-featured B-scan ,
full-featured B-scanand RF display

High resolution color display with
analogperformance and digital advantages
Vibrantcolors
• Hi-resolution (640 x 480 pixels) Color LCDDisplay with unique signal processing produces “Analog Look and Performance”echo dynamics.
• Select from four vibrant display color schemesto match lighting conditions and personal preference.
•Choosefrom eight A-scan colors to relieve boredom & eye fatigue.
•Adjustbrightness for easy viewing under all lighting conditions.
•Gatesand gate functions are color coded for easy identification and fast adjustment.
Tools for easy weld inspection
•Color Leg allows easy identification ofleg and skip distances for weld inspection.

Color Legindicator displays the legs of the angle beam inspection in different colors
•GRIDdynamically changes bands of display background colors for each leg.
•A-Scandynamically changes the color for each leg of the “live” A-Scan.
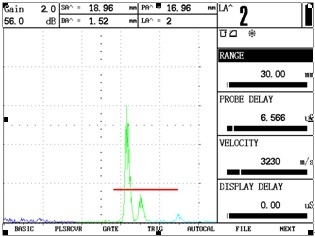
•Weld RatingCalculation simplifies the rating of weld indications according to AWS SpecificationD1.1, (Formula D = A – B – C).

•Trigonometric flawlocation function with curvature correction automatically calculates depth,surface distance, and sound path to flaw along with the leg of the inspectionwhen using angle beam probes. All TOF measurements can be displayed in mm or inches.
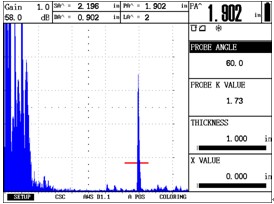
Four digitalreading boxes at top display trigonometric calculations for weld inspection (SAsound path to flaw in gate A, PA projection distance to flaw in gate A, DAdepth to flaw in Gate A & LA leg of inspection that flaw occurs in gate A)
•Real time(single shot) analog and TTL outputs handle a wide range of systemsapplications.
•Choose fromFour Freeze Modes: ALL, Peak Std, Compare or Envelope for optimum waveformevaluation and comparison.
•Three VariablePersistence Modes are selectable in Freeze Envelope to visually assist flawdetection & evaluation for scanning and moving part inspections.
•Behind-the-Freezemode allows dynamic time base adjustments on frozen echoes. It also storesadditional information both before and after the specified range to enablemovement of the frozen image.
•Compare frozenreference waveforms to live A-Scans in different colors to easily interprettest results.
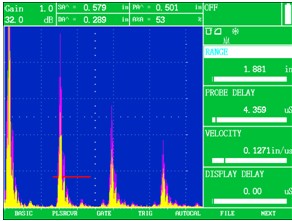
More measurement capability options
andinspection data management
Tools for easy defect sizing
•40 dB dynamic multiple curve DAC/ TCGOption corrects for distance/ amplitude variations from material loss and beamspread with ability to edit or insert recorded echoes individually. Up to fourDAC curves can be drawn on the screen at one time to show +/- dB curves inaddition to the originally recorded DAC curve. Up to 16 data points can berecorded with a maximum curve slope of 12 dB per microsecond. Meets or exceedsindustry requirements for TCG.
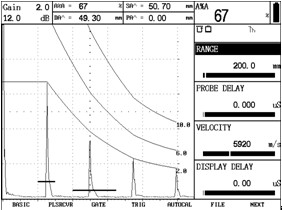
Multiple curve DAC shows recorded DACcurve in magenta with 4 additional curves based upon dB Offset feature foradded flaw sizing assistance. TCG Attenuation and Transfer Correction featuresmake it very versatile for use on other materials and surface conditions.
•DGS (Distance Gain Size) Option displays acurve for a particular equivalent reflector size as a function of the distancefrom the probe to the reflector. The ERS (Equivalent reflector size) functionautomatically calculates the corresponding equivalent reflector diameter in mmor inches for any echo in the measurement gate.

User preferred features...
•Simple operation with fast rotary knobadjustments; gain is always directly accessible with the left hand adjustmentkey and lockable.
•Auto CAL makes calibration fast & easy
•65 selectable material velocities at theuser’s fingertips.
•2 independent gates monitor amplitude andsound path distance for both flaw detection and thickness measurementapplications.
•250 KHz to 20 MHz capability to matchprobe for optimum performance.
•RF display mode enhances signal evaluationand bond inspection of dissimilar materials.
•4 selectable damping settings (50, 75,150, 500 ohms) for optimum probe performance.
• 0.5 mm to 10 m range (in steel) covers thin to lengthy acousticallyclean materials.
•dB REF key evaluates subsequent echoesgain value and amplitude against the highest echo in Gate A (reference echo)when activated.
•VGA Output Option provides an easy way toconnect to a PC monitor or PC projector for viewing by large audiences ortraining purposes.
Documentation and recording
•Store & preview a minimum of 900user-named data sets with A-Scans for quick recall and instrument setup.
•DU DataPro software program forbi-directional communication with a PC for easy storage of data sets withA-scan and documentation of test results. This software program also simplifiesthe transfer, storage, analysis, and documentation of thickness data.
•Reports with A-Scans are output directlyto a portable printer.
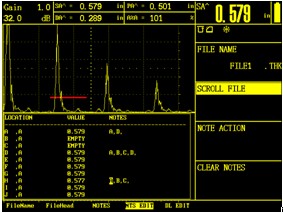
•Alphanumeric Thickness Datalogger for flexible,convenient storage of thickness readings in Linear, Grid, or Custom-Linear filestructures with user-input filenames, location I.D.’s, notes, memo, &header fields.
